


Appointments in StriveDB are not just calendar events -- they are the backbone of scheduling, documenting services, and staying compliant with your organization's workflow. Whether it is a counseling session, advocacy check-in, or group meeting, the appointment system helps you handle it quickly and cleanly.
This post walks through how to create, manage, and follow up on appointments.
Accessing the Appointment Scheduler
There are two main ways to schedule a new appointment in StriveDB:
- From the top convenience bar, click "Schedule" -- available from anywhere in the system.
- From a client's profile, click "Schedule Appointment" to auto-fill that client into the form.
Tip: Starting from a client's profile saves time and avoids duplicate searching.
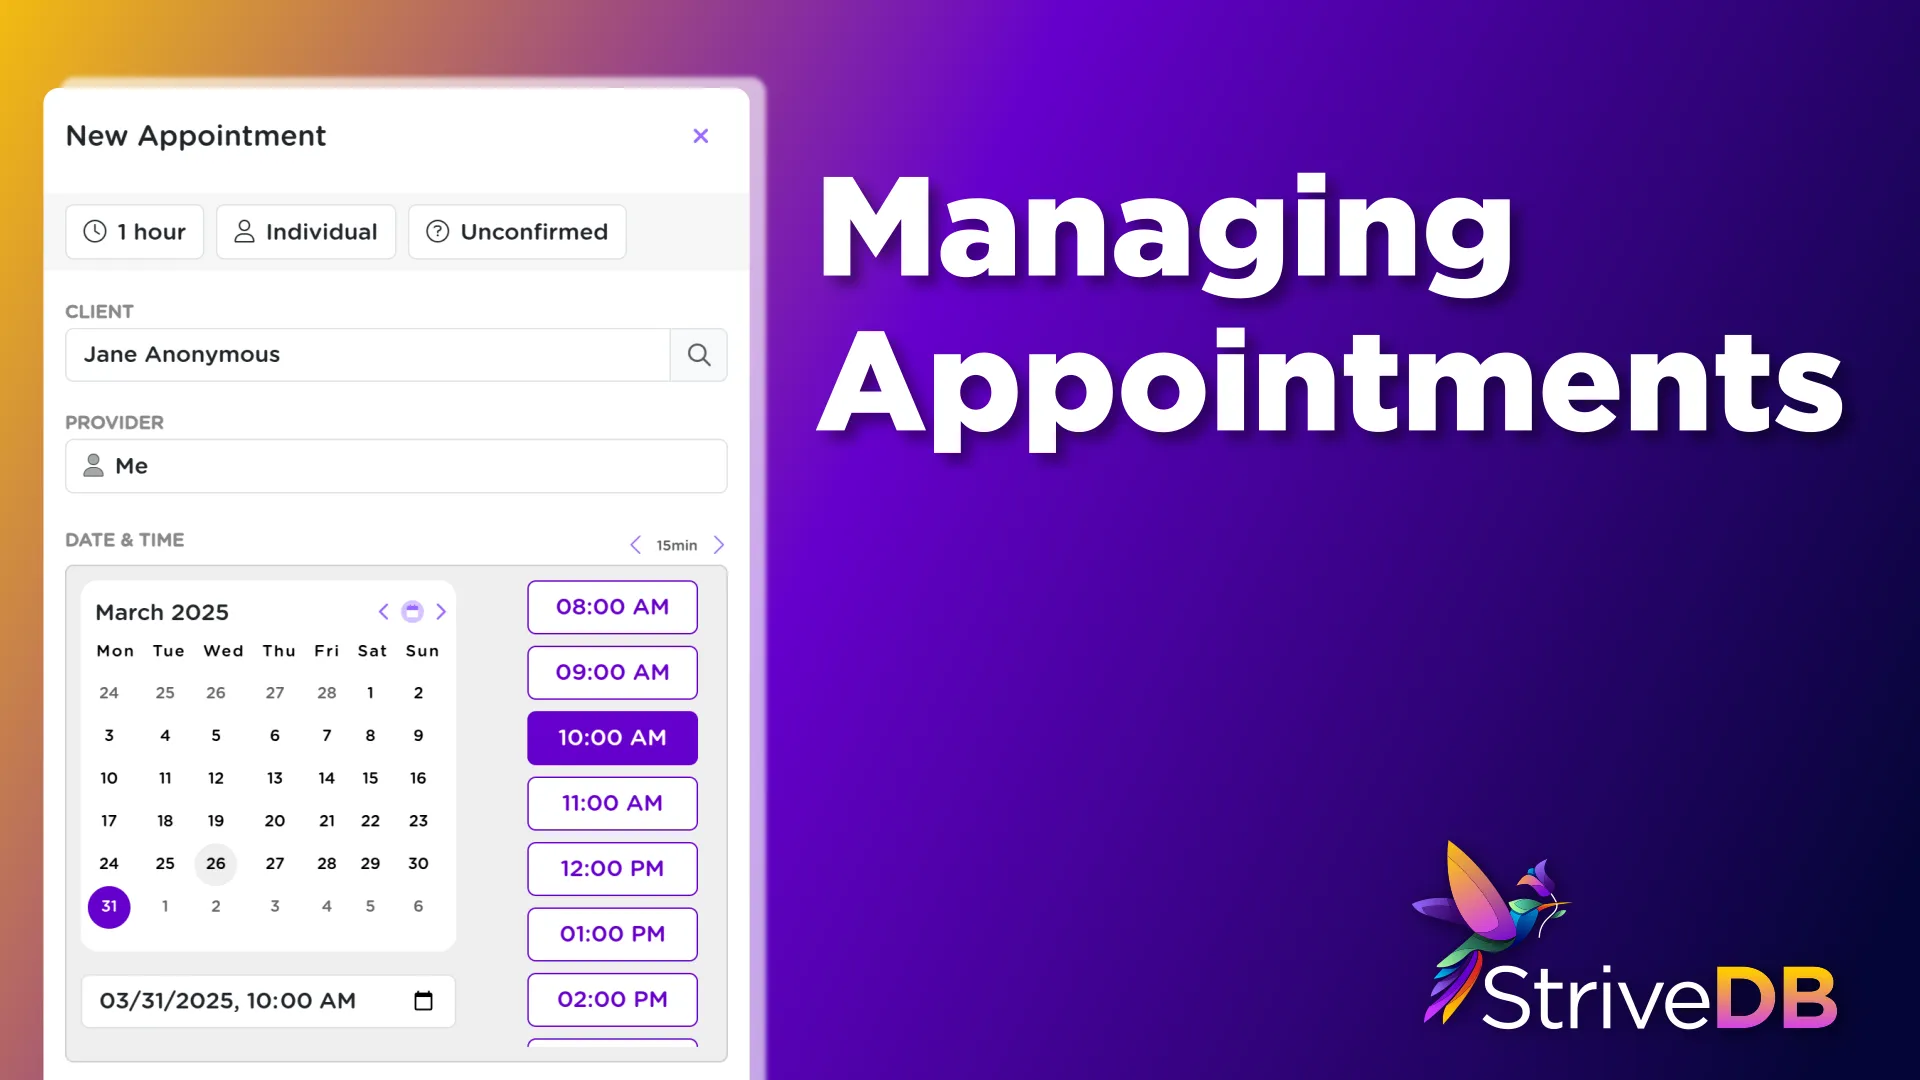
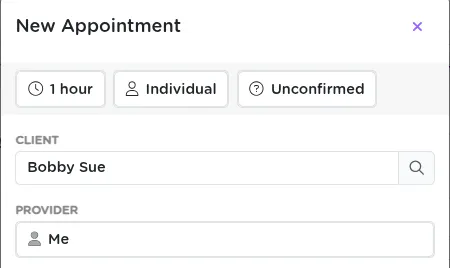
Configuring Appointment Details
At the top of the appointment form, you will configure the key details:
- Duration -- Choose how long the session will be
- Type -- Individual or group appointment
- Status -- Tentative, confirmed, cancelled, etc.
- Provider -- Defaults to you, but can be reassigned to another staff member
Keeping appointment statuses updated helps other team members know what is coming up.
Selecting a Date and Time
Use the built-in calendar widget to find available times. It shows:
- Which days have openings (based on your availability settings)
- Time slots on a selected day
- Real-time updates so you do not accidentally double-book
Once you find the right slot, click it and continue.

Adding Location and Notes
Next, include optional but helpful context:
- Location -- e.g., "Zoom", "Room 2", or "Off-site"
- Note -- Any notes you want visible to team members viewing the appointment
Saving the Appointment
Once everything is filled out, click Save.
You will be taken directly to the appointment's detail page, where you can:
- Review or edit the info
- Add session notes
- Start follow-up tasks right away
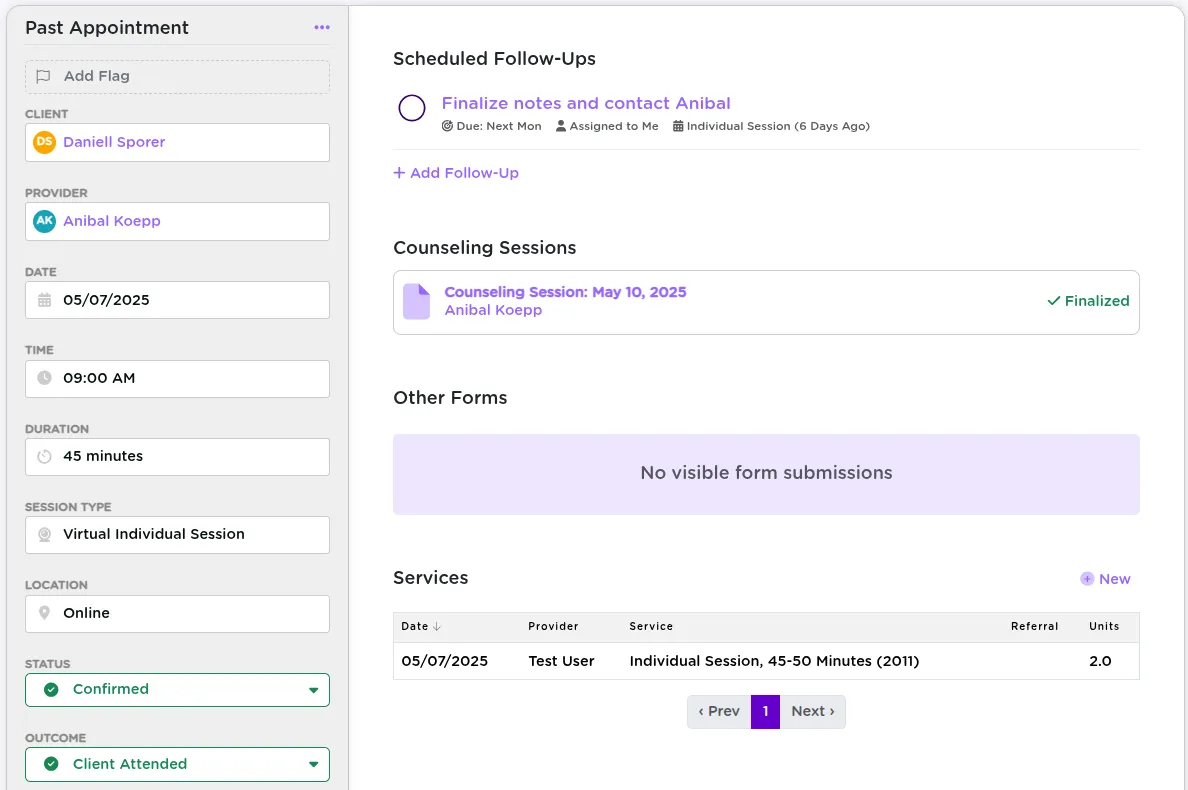
Updating Appointments After They Occur
Once the appointment has occurred -- or not -- you will want to log the outcome. From the appointment's page, you can:
- Mark attendance status (e.g., Attended, Late, No-show)
- Add a Follow-Up Reminder
- Attach a Counseling Session, often using a session-specific form
- Edit or reschedule the appointment as needed
This workflow ensures your services are recorded accurately and quickly tie into reports and grant tracking.
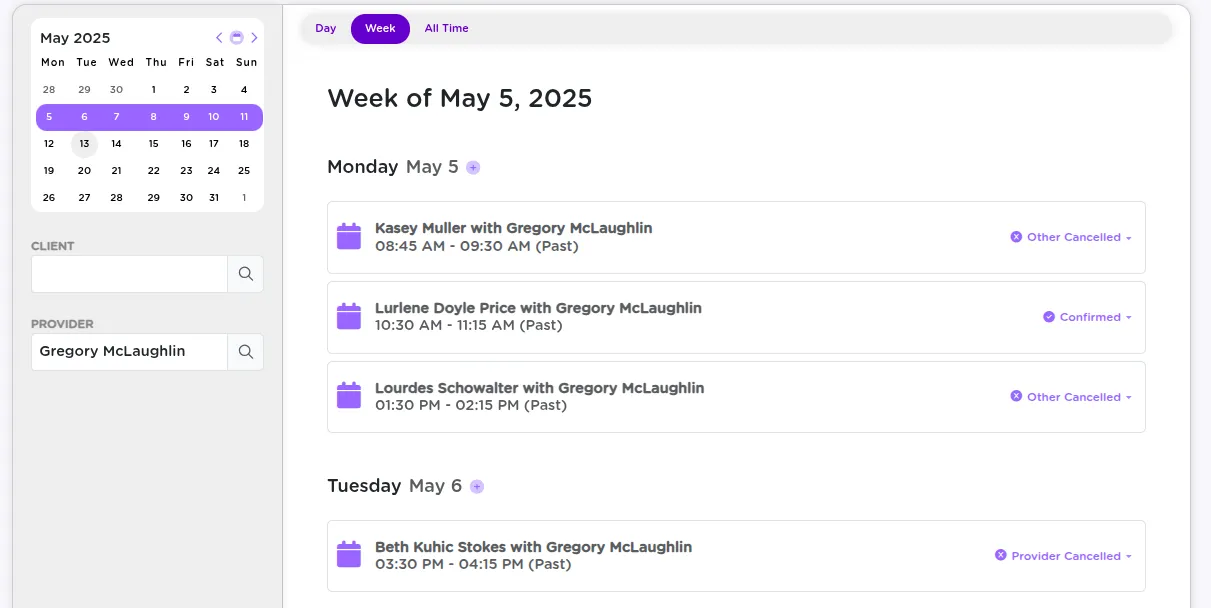
Viewing and Filtering Appointments
From the Appointments tab, you can:
- View daily or weekly schedules
- Filter by staff member, client, or service type
- Switch between list view and calendar view
- Jump to a date or scroll ahead for upcoming work
How Appointments Connect to Case Work
Appointments automatically connect to:
- Client profiles -- full appointment history and documentation
- Staff and provider records
- Service logs -- when tied to session forms
- Reporting -- all outcomes and durations feed into organizational data
This means nothing gets lost and everything you log stays tied to the broader support picture.
Summary
Appointments in StriveDB are fully integrated records of service. They help you track what happened, stay on schedule, and document the critical work your team is doing.
Need help setting up availability or figuring out provider scheduling? Reach out to support -- we are happy to help.